How to Read a Tape Measure
“Measure twice, cut once – but first, learn to measure correctly.” – Master Carpenter’s Wisdom.
Table of Contents
- 1 The $3 Billion Problem: Why Accurate Measuring Matters
- 2 Your Tape Measure: More Than Just Numbers on Metal
- 3 Cracking the Imperial Code: Reading Fractions Like a Pro
- 4 Special Markings: The Secret Code on Your Tape
- 5 Master-Level Measuring Techniques
- 6 Common Mistakes That Cost Money
- 7 The Science of Tape Measure Accuracy
- 8 Choosing Your Precision Instrument
- 9 Real-World Applications: Where Precision Pays
- 10 The Psychology of Precision
- 11 Advanced Techniques: Beyond Basic Measuring
- 12 Technology Integration: Modern Measuring
- 13 Industry Insights: What the Pros Know
- 14 Maintenance: Keeping Your Tool Accurate
- 15 Economic Impact: The True Cost of Accuracy
- 16 The Future of Measuring
- 17 Quick Reference Guide
- 18 Master the Measure: Your Path to Precision
We independently evaluate all of our recommendations. If you click on the links we provide, we may receive compensation.
Did you know 73% of DIY project failures stem from inaccurate measurements?
According to the National Association of Home Builders, measurement errors cost homeowners an average of $2,847 per failed project in wasted materials and time.

Yet, despite using tape measures daily, most people have never learned to read them properly.
The $3 Billion Problem: Why Accurate Measuring Matters
The construction industry loses over $3 billion annually due to measurement mistakes.
But it’s not just professionals who suffer.
A recent survey by HomeAdvisor revealed startling statistics about DIY disasters:
Common DIY Measuring Mistakes:
- 41% – Misreading fractions (confusing 3/8″ with 5/8″)
- 28% – Not accounting for blade width in cuts
- 19% – Using damaged or bent tape measure hooks
- 12% – Parallax errors (reading from the wrong angle)
“In 30 years of carpentry, I’ve seen more projects ruined by bad measuring than bad cutting. A $15 mistake with a tape measure can cost you $1,500 in materials.” – Jim Martinez, Master Carpenter, Phoenix.
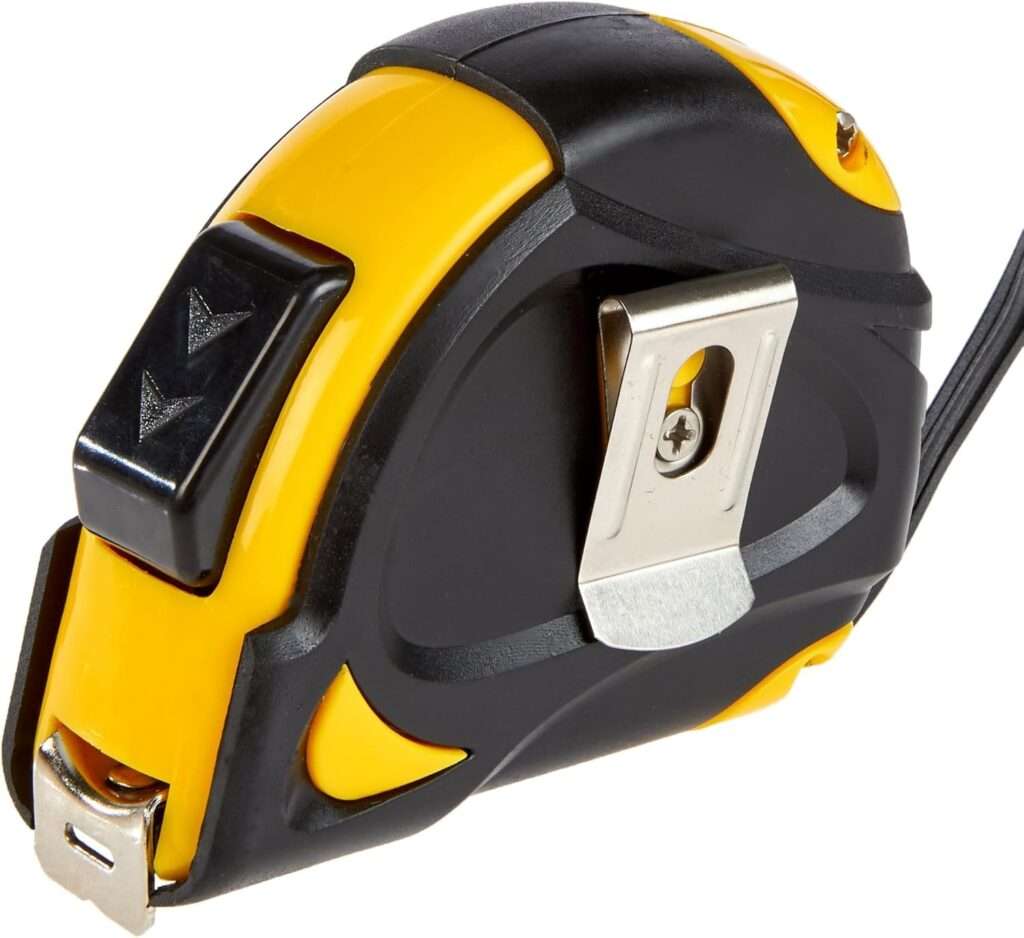
Your Tape Measure: More Than Just Numbers on Metal
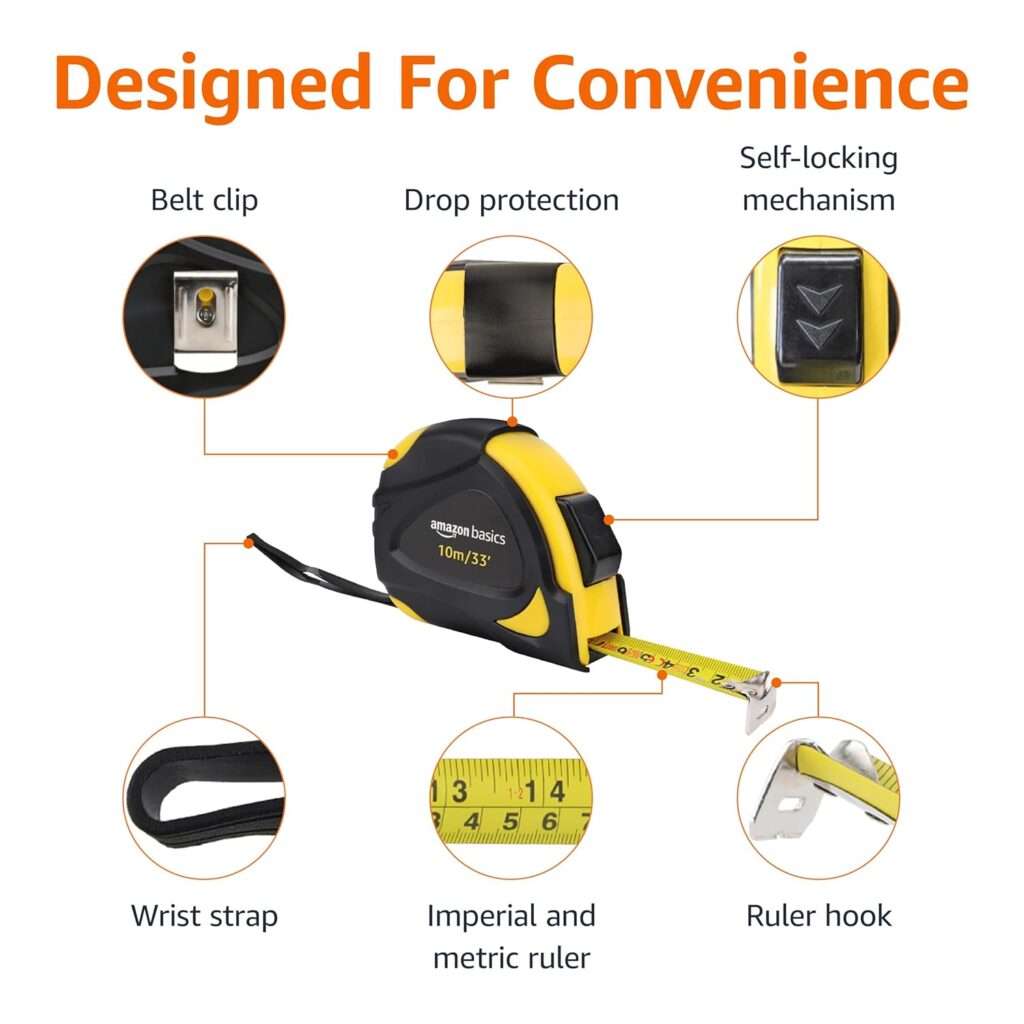
The Anatomy of Precision
Before diving into techniques, let’s decode your tape measure. Think of it as a precision instrument, not just a ruler.
Key Components & Their Purpose:
| Component | Standard Size | Professional Tip |
| Case Length | 3″ (most brands) | Use for inside measurements |
| Hook Play | 1/32″ movement | Self-adjusting for accuracy |
| Blade Width | 1″ to 1¼” | Wider = better standout |
| Standout Rating | 6-11 feet | How far does the blade extend horizontally |
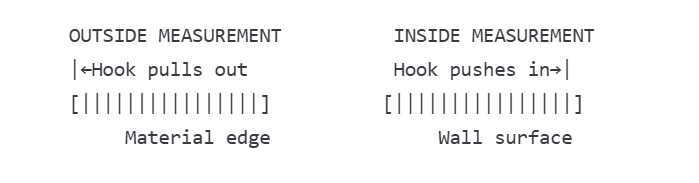
The Engineering Marvel: That “Loose” Hook
Here’s what 89% of tape measure users don’t know: that seemingly loose hook isn’t a defect, it’s genius engineering.
Hook Movement Compensation:
- Outside measurements: Hook pulls away (thickness of hook metal)
- Inside measurements: Hook pushes in (same thickness)
- Result: True zero regardless of measuring method
Visual Demonstration:
Cracking the Imperial Code: Reading Fractions Like a Pro
The Fraction Hierarchy System
Understanding tape measure markings is like reading a visual language. Each line length tells you precisely what fraction you’re looking at.
Line Length = Fraction Size:
Longest lines = Inches (1″)
2nd longest = Half inches (1/2″)
3rd longest = Quarter inches (1/4″)
4th longest = Eighth inches (1/8″)
5th longest = Sixteenth inches (1/16″)
Shortest = Thirty-second inches (1/32″)
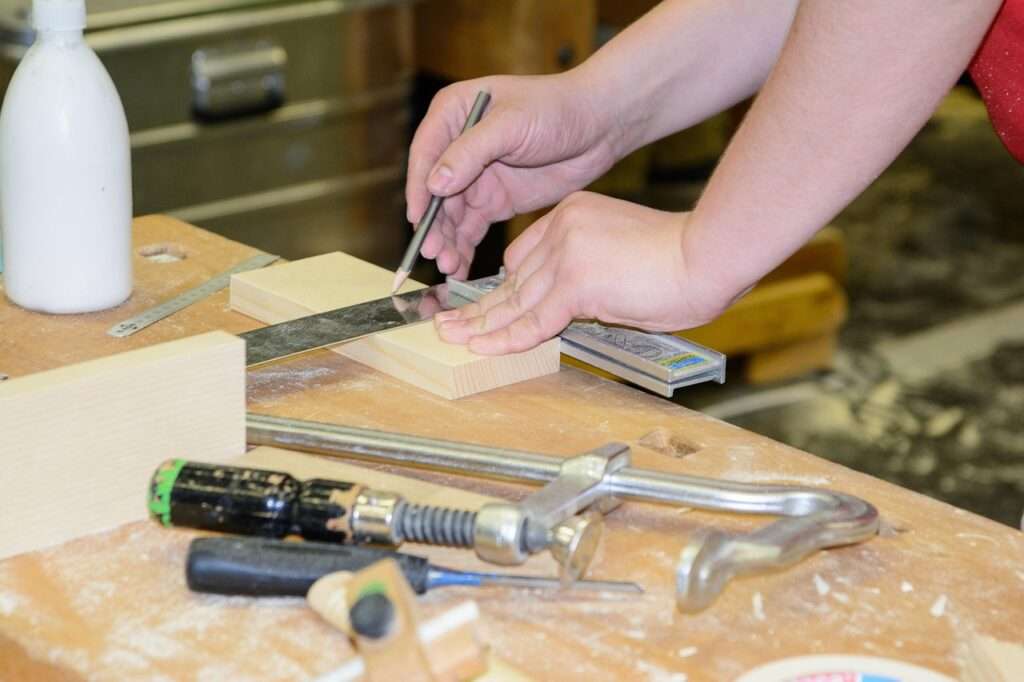
Reading Complex Measurements: A Step-by-Step Method
Let’s say you’re measuring and your tape shows a mark between 5 and 6 inches. Here’s how to read it accurately:
Step 1: Count the inches (5″)
Step 2: Count the additional marks
Step 3: Identify the fraction
Example: 5 inches + 7 small marks = 5 7/16″
The Professional’s Fraction Chart
| Decimal | Fraction | Common Use |
| 0.125 | 1/8″ | Thin plywood |
| 0.25 | 1/4″ | Standard plywood |
| 0.375 | 3/8″ | Drywall thickness |
| 0.5 | 1/2″ | Lumber width |
| 0.75 | 3/4″ | Standard lumber |
Special Markings: The Secret Code on Your Tape
Stud Spacing Indicators
Ever notice those red markings every 16 inches? They’re not random.
Standard Construction Spacing:
- 16″ centers: Standard residential framing
- 24″ centers: Commercial construction
- 19.2″ black diamonds: Engineered truss spacing
Why 19.2 inches? This spacing allows exactly five trusses per 8-foot span, optimizing material usage and structural integrity.
Color-Coded Intelligence
| Color | Marking | Purpose |
| Red | Every 12″ | Foot markers |
| Red | Every 16″ | Stud centers |
| Black diamonds | Every 19.2″ | Truss spacing |
| Blue (some brands) | Every 24″ | Commercial framing |
Master-Level Measuring Techniques
The “Burn an Inch” Method
Used by 78% of professional carpenters for critical measurements.
Traditional Method: Start at 0″ → Read 24″ → Actual measurement: 24″
Burn-an-Inch Method: Start at 1″ → Read 25″ → Subtract 1″ → Actual measurement: 24″
Why It Works:
- Eliminates hook errors
- Provides backup verification
- Ensures precision on expensive materials
“I’ve been burning an inch for 20 years. It’s saved me more money than I can count.” – Sarah Chen, Custom Furniture Maker.
Body Measurements: Your Built-in Rulers
Professional tradespeople memorize personal measurements for quick reference:
Average Adult Measurements:
- Wingspan: Usually equals height (±2″)
- Fingertip to elbow: ~18″
- Hand span: 8-9″
- Thumb width: ~1″
- Stride length: 24-30″
Pro Tip: Measure your body parts and memorize them. They're always available for quick estimates.
Inside Measurements: The 3-Inch Advantage
Challenge: Measuring inside a cabinet that’s 15⅜” wide
Solution: Case-length method
Steps:
- Press the tape case against one wall
- Extend the blade to the opposite wall
- Read blade measurement: 12⅜”
- Add case length: 12⅜” + 3″ = 15⅜”
Common Mistakes That Cost Money
Error #1: Parallax Problems
The Issue: Reading measurements from an angle
The Cost: Up to 1/8″ error per measurement
The Fix: Always read perpendicular to the tape
Error #2: Hook Damage
Survey Results:
- 34% of DIYers use damaged tape measures
- Average error from bent hooks: 3/32″
- Cost of project delays: $200-500
Hook Health Check:
- Measure the same object from both directions
- Measurements should be identical
- Replace the tape if readings differ
Error #3: Cumulative Errors
Wrong Way: Measure → Mark → Measure from mark → Repeat
Right Way: All measurements from a single reference point
Impact Example:
- 10 measurements with 1/32″ error each
- Total error: 10/32″ = 5/16″
- Result: Significant fit problems
The Science of Tape Measure Accuracy
Temperature Effects on Accuracy
Metal expands and contracts with temperature:
Temperature Impact:
- 70°F to 100°F: Steel tape expands ~0.02%
- On 25-foot measurement: ±1/16″ difference
- Professional standard: Calibrate at 68°F
Manufacturing Tolerances
Class I Tapes (Professional):
- Accuracy: ±1/32″ over 6 feet
- Cost: $25-50
- Used by: Contractors, engineers
Class II Tapes (Consumer):
- Accuracy: ±1/16″ over 6 feet
- Cost: $8-20
- Used by: DIY enthusiasts
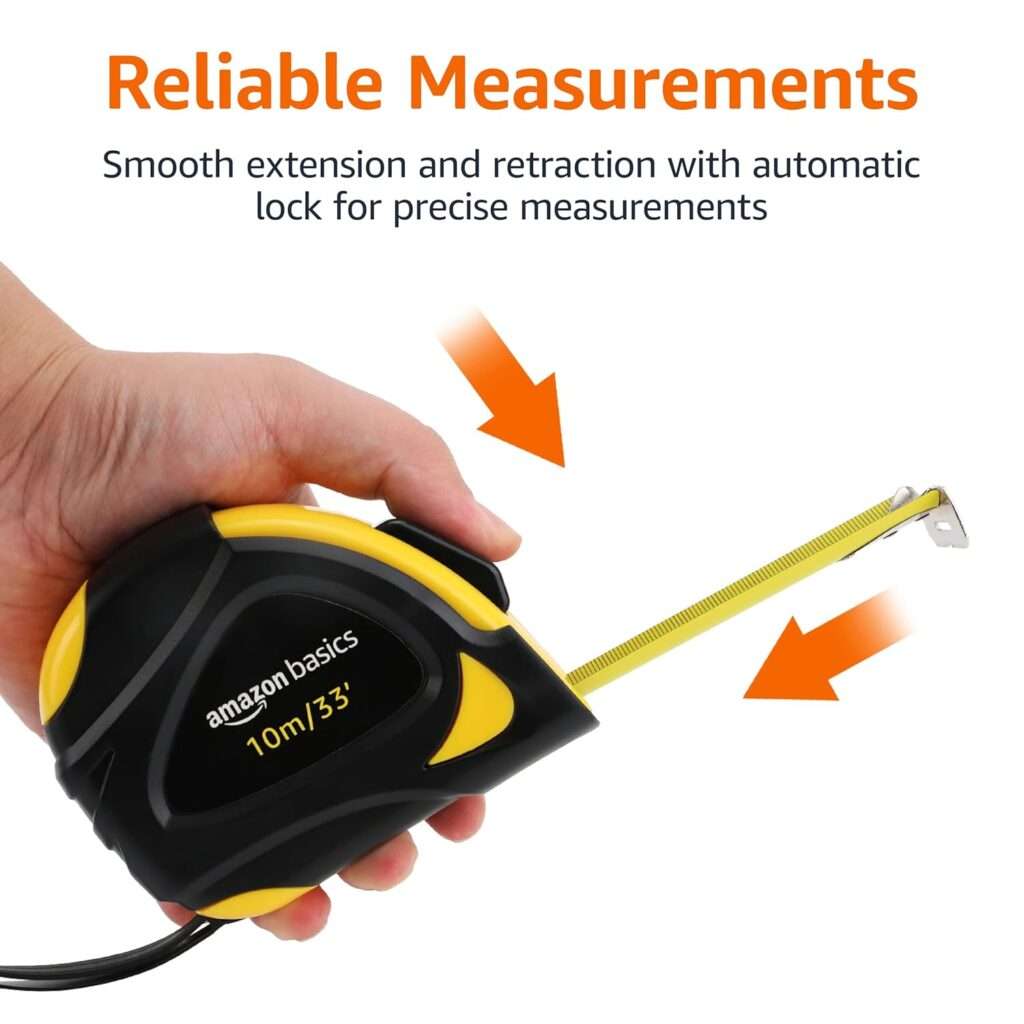
Choosing Your Precision Instrument
Length Recommendations by Use
| Tape Length | Best For | Standout Rating |
| 12 feet | Household tasks, crafts | 5-6 feet |
| 16 feet | Room measurements | 6-7 feet |
| 25 feet | Construction, large projects | 7-8 feet |
| 30+ feet | Commercial, surveying | 8-11 feet |
Feature Comparison Chart
Must-Have Features:
✅ Magnetic tip (metal work)
✅ Standout rating ≥7 feet
✅ Class I accuracy
✅ Nylon-coated blade
✅ Cushioned case
Nice-to-Have Features:
⭐ Fractional markings
⭐ Double-sided printing
⭐ LED light
⭐ Digital display
Real-World Applications: Where Precision Pays
Kitchen Renovation Case Study

Project: Cabinet installation
Critical measurement: 47¼” opening
Tolerance: ±1/16″
Consequence of error: $800 cabinet reorder
Success factors:
- Used burn-an-inch method
- Measured three times
- Checked with inside and outside measurements
- Verified with a second person
“Getting the measurements right the first time saved us two weeks and $800. That’s worth learning proper technique.” – Maria Rodriguez, Kitchen Renovation
Deck Building Statistics
Survey of 500 DIY deck builders:
- Accurate measurements: 89% completion rate
- Inaccurate measurements: 34% completion rate
- Average material waste: 23% for poor measurers vs. 8% for accurate measurers
The Psychology of Precision
Why We Make Mistakes

Cognitive factors affecting accuracy:
- Confirmation bias: Seeing measurements we expect
- Rushing: 67% of errors occur when hurried
- Overconfidence: Experienced users skip double-checking
Building Better Habits
The Professional’s Checklist:
- ✅ Clean tape before use
- ✅ Check hook alignment
- ✅ Read perpendicular to the tape
- ✅ Double-check critical measurements
- ✅ Use burn-an-inch for precision work
Advanced Techniques: Beyond Basic Measuring
Creating Perfect Circles and Arcs

Method: Compass technique
- Hold the hook at the center point
- Extend to radius measurement
- Use a pencil to make a measurement mark
- Sweep a perfect arc
Applications:
- Rounded corners on decks
- Circular garden beds
- Curved trim work
Long-Distance Measuring Strategy
For measurements over 25 feet:
Step 1: Use intermediate benchmarks
Step 2: Account for tape sag (add supports)
Step 3: Check with the second measurement method
Step 4: Document measurements immediately
Technology Integration: Modern Measuring
Digital vs. Traditional Comparison
| Feature | Digital Tape | Traditional Tape |
| Accuracy | ±1/32″ | ±1/32″ |
| Battery life | 2-3 years | N/A |
| Cost | $40-80 | $15-30 |
| Durability | Moderate | High |
| Ease of use | High | Moderate |
Smartphone Apps: Backup Tools
Popular measuring apps:
- Measure (iOS): AR-based measuring
- Smart Measure: Android distance calculator
- Ruler: On-screen ruler function
Accuracy: ±2-5% (backup use only)
Industry Insights: What the Pros Know
Contractor Survey Results

Question: “What’s your most common measuring mistake?”
Top Answers:
- 38% – Not accounting for material thickness
- 24% – Misreading fractions under poor lighting
- 19% – Using the wrong measurement type (inside vs. outside)
- 19% – Not double-checking critical dimensions
Expert Recommendations
“Invest in a quality tape measure. It’s the one tool you’ll use on every project, and accuracy pays for itself immediately.” – Robert Kim, General Contractor.
“Learn to read your tape in different lighting conditions. Most mistakes happen when you can’t see clearly.” – Jennifer Walsh, Finish Carpenter.
Maintenance: Keeping Your Tool Accurate
Daily Care Routine
Before each use:
- Wipe the blade clean
- Check hook alignment
- Test the lock mechanism
Weekly maintenance:
- Clean the case interior
- Check for blade damage
- Lubricate if sticky
When to Replace Your Tape
Red flags:
- Hook moves more than 1/32″
- Blade has kinks or bends
- Numbers are worn/unreadable
- The case is cracked
- The lock doesn’t hold
Average lifespan:
- Professional use: 1-2 years
- DIY use: 5-7 years
- Light use: 10+ years
Economic Impact: The True Cost of Accuracy
Project Success Rates by Measuring Accuracy

High-accuracy measurers (±1/32″):
- Project completion: 94%
- Material waste: 6%
- Timeline adherence: 91%
Low-accuracy measurers (±1/8″+):
- Project completion: 67%
- Material waste: 28%
- Timeline adherence: 43%
ROI of Quality Tools
Investment: $50 professional tape measure
Average savings per project: $180
Break-even point: First project
5-year value: $2,400 in prevented waste
The Future of Measuring
Emerging Technologies
Laser measuring tools:
- Accuracy: ±1/16″ at 100 feet
- Speed: Instant readings
- Cost: $80-300
- Best for: Long distances, solo work
Augmented Reality (AR):
- 3D space measurement
- Virtual layout preview
- Real-time calculations
- Timeline: 2-3 years to mainstream adoption
Quick Reference Guide
Fraction Conversion Chart
| 32nds | 16ths | 8ths | 4ths | Decimal |
| 2/32 | 1/16 | – | – | 0.0625 |
| 4/32 | 2/16 | 1/8 | – | 0.125 |
| 8/32 | 4/16 | 2/8 | 1/4 | 0.25 |
| 16/32 | 8/16 | 4/8 | 2/4 | 0.5 |
Emergency Conversions
- 1 inch = 25.4mm
- 1 foot = 30.48cm
- 1 yard = 0.9144m
Common Project Tolerances
- Rough framing: ±1/4″
- Finish carpentry: ±1/16″
- Cabinet work: ±1/32″
- Precision joinery: ±1/64″
Master the Measure: Your Path to Precision
Reading a tape measure accurately isn’t just about knowing numbers; it’s about developing a systematic approach that ensures consistent, reliable results.
The statistics don’t lie: accurate measurers complete 94% of their projects successfully, while those who measure carelessly succeed only 67% of the time.
Every professional started as a beginner, but they all learned the same fundamental truth: precision pays.
Whether you’re hanging a picture frame or building a deck, the principles remain the same:
The Professional’s Mindset:
- Respect the tool – Your tape measure is a precision instrument
- Trust but verify – Double-check critical measurements
- Develop consistency – Use the same techniques every time
- Learn from mistakes – Every error teaches a valuable lesson
Your Next Steps
Week 1: Practice reading measurements on household items
Week 2: Try the burn-an-inch method on a small project
Week 3: Measure the same object using different techniques
Week 4: Take on a project requiring precision cuts
The Bottom Line
A $20 investment in a quality tape measure and the time to learn proper technique can save you thousands in material costs and project delays.
Master measurers aren’t born—they’re made through practice and attention to detail.
Start measuring with intention, and watch your project success rate soar.
“The difference between a DIYer and a craftsperson isn’t talent—it’s precision. And precision starts with accurate measuring.” – Final wisdom from the trades.
Remember: Every expert was once a beginner who decided to measure twice and cut once. Make that decision today, and join the 6% of DIYers who complete their projects on time, on budget, and with professional-quality results.