How to Use a Pipe Threading Tool: Beginner Guide
If you are working on a plumbing project for the first time and need to connect steel or iron pipes, knowing how to use a pipe threading tool correctly will save you time, money, and a lot of frustration. This guide walks you through everything you need to get clean, professional threads on your pipes without any prior experience.
We independently evaluate all of our recommendations. If you click on links we provide, we may receive compensation.
Table of Contents
- 1 What Is a Pipe Threading Tool?
- 2 Tools and Materials You Will Need
- 3 Step by Step: How to Thread a Pipe
- 4 Step 1: Cut the Pipe to Length
- 5 Step 2: Deburr the End of the Pipe
- 6 Step 3: Secure the Pipe in a Vise
- 7 Step 4: Select and Load the Correct Die
- 8 Step 5: Apply Thread Cutting Oil
- 9 Step 6: Start Threading
- 10 Step 7: Remove the Die and Clean the Threads
- 11 Tips for Getting Perfect Threads Every Time
- 12 Common Mistakes Beginners Make
- 13 Final Thoughts
What Is a Pipe Threading Tool?
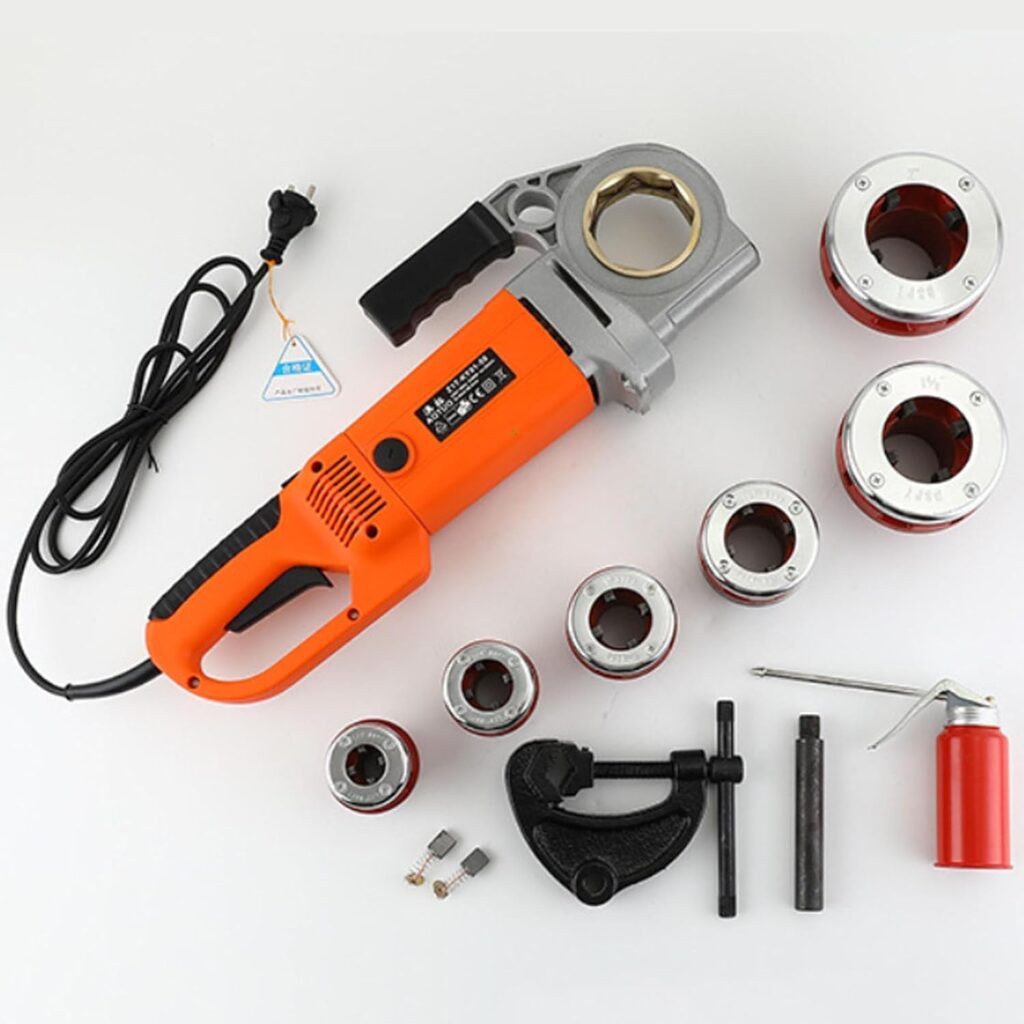
A pipe threading tool is a hand or power tool used to cut helical grooves, called threads, onto the outside of a pipe. These threads allow you to screw the pipe directly into fittings, connectors, or other pipes to create a tight, leak-free joint.
The most common type for beginners is the ratchet pipe threader, which works manually and gives you full control over the cutting depth and speed. You can also find electric pipe threading machines, which are faster and better suited for larger projects.
Tools and Materials You Will Need
- Ratchet pipe threader or electric threading machine
- Die set matched to your pipe size (common sizes include 1/2 inch, 3/4 inch, and 1 inch)
- Pipe cutter or hacksaw
- Pipe reamer or deburring tool
- Thread cutting oil
- Pipe vise or bench vise
- Measuring tape and marker
- Safety gloves and eye protection
Step by Step: How to Thread a Pipe
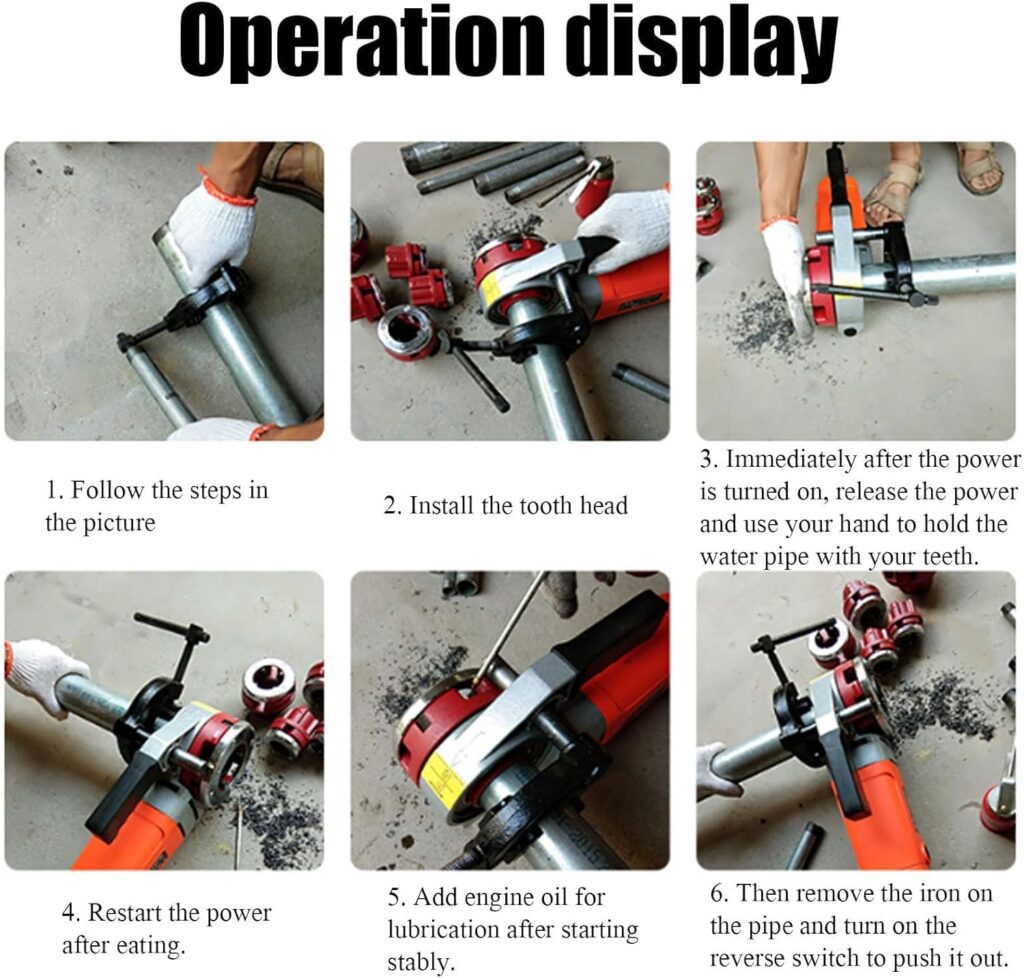
Step 1: Cut the Pipe to Length
Measure the section of pipe you need and mark it clearly with a marker. Use a pipe cutter for the cleanest cut. Rotate the cutter around the pipe, tightening the blade slightly with each rotation until the pipe separates cleanly. If you use a hacksaw, take your time to keep the cut as straight as possible.
Step 2: Deburr the End of the Pipe
After cutting, you will notice a rough inner edge on the pipe. This is called a burr. Insert a pipe reamer into the cut end and rotate it to remove the burr. A smooth inner edge improves water flow and prevents damage to seals and fittings. Do not skip this step.
Step 3: Secure the Pipe in a Vise
Clamp the pipe firmly in your pipe vise, leaving about six inches of pipe extending past the vise jaws. A stable pipe is essential for cutting even threads. If the pipe moves while you work, the threads will come out uneven or damaged.
Step 4: Select and Load the Correct Die
Match the die size to your pipe diameter. Most pipe threaders use NPT (National Pipe Taper) dies, which are the standard for plumbing work in the United States and many other countries. Slide the die into the die head of your ratchet threader with the tapered end facing the pipe. Lock it in place according to your tool’s instructions.
Step 5: Apply Thread Cutting Oil
Thread cutting oil is not optional. It lubricates the die, reduces heat, and extends the life of your cutting tool. Apply a generous amount of oil directly to the end of the pipe and to the die itself before you begin cutting. Keep applying oil every few turns throughout the process.
Step 6: Start Threading
Place the die head flat against the end of the pipe. Apply firm, even pressure and rotate the ratchet handle clockwise. After every two full turns forward, back off half a turn to clear the metal chips from the cutting teeth. Continue this pattern until the pipe extends one thread past the front face of the die. That is usually the right depth for a proper seal.
Step 7: Remove the Die and Clean the Threads
Switch the ratchet to reverse and back the die off the pipe. Wipe away the metal shavings and excess oil with a clean rag. Inspect your threads carefully. They should be uniform, clean, and sharp all the way around the pipe. Damaged or incomplete threads will cause leaks, so cut again from scratch if the threads look uneven.
Tips for Getting Perfect Threads Every Time
- Always start with a square, burr-free cut for the cleanest thread entry
- Never force the die. Let the tool do the work at a steady pace
- Use fresh cutting oil throughout the entire process, not just at the start
- Test fit the pipe into a fitting before installation to confirm the thread depth is correct
- Replace worn dies promptly since dull cutting teeth produce ragged threads that leak
Common Mistakes Beginners Make
Skipping the deburring step is the most frequent beginner mistake. It leads to uneven threads and potential damage to fittings. Another common error is failing to use cutting oil, which causes the die to overheat and wear out faster. Finally, many beginners push too hard and too fast. Threading is a slow, deliberate process, and rushing always results in poor quality threads.
Final Thoughts
Using a pipe threading tool is a skill you can master with a little practice and the right technique. Follow each step carefully, use the correct die size, and never rush the process.
Once you are comfortable with the ratchet threader, you will be able to tackle a wide range of plumbing repairs and installations with complete confidence.
How to use a pipe threading tool correctly for beginners cutting clean threads on steel and iron pipes at home.
Also Read On:
Best Pole Saws for Trimming High Branches
10 Must-Have Tools for Every Homeowner
Best Portable Tool Bags for Contractors: Top Picks to Keep You Job Ready